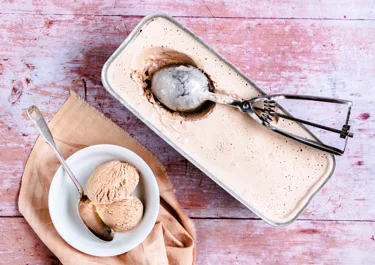
Protein ice cream


Instructions
Questions about protein ice cream
Create a frosty treat that's equal parts refreshing and indulgent with our protein ice cream recipe. Explore our list of frequently asked questions for tips on flavour variations and achieving an extra creamy texture.
Ingredients
Egg yolks, pasteurised | 5 |
|---|---|
Egg whites, pasteurised | 4 |
Sugar | 60 g |
Protein chocolate milk drink | 250 ml |
| 200 ml | |
Vanilla powder | 1 tsp |

Other recipes


Thaw your protein ice cream for easy scooping
When your protein ice cream is firm enough, let it warm up at room temperature for 5-10 minutes before serving. This short wait makes it much easier to scoop and ensures the ice cream is at its best for eating.
Expert techniques to separate eggs
The easiest technique to separate egg white and egg yolk is to crack the egg gently in the middle and open it over a bowl. Carefully transfer the yolk back and forth between the two shells, letting the white drip into the bowl below.
Alternatively, you can use your clean hands to catch the yolk while allowing the white to slip through your fingers – though there’s a higher risk the yolk slips through this way. When executed well both methods ensure a clean separation without breaking the yolk.
Whisk your egg whites to fluffy perfection
Creating fluffy egg whites starts with choosing room-temperature eggs, as they whip more easily and achieve greater volume. Use a clean, dry bowl, preferably metal or glass, to prevent any grease or moisture from interfering.
Begin whisking at low speed until the whites become frothy, then increase to medium-high speed, optionally adding a small pinch of salt or cream of tartar to stabilise the whites. Continue whisking until stiff peaks form, where the whites stand up straight when the whisk is lifted.
Advanced preparation techniques
Creating a smooth protein ice cream starts with the skill of tempering eggs. Start by slightly warming the protein chocolate milk drink, then slowly whisk into the room-temperature egg yolk and sugar mixture. This ensures an extra smooth base, crucial for a stable and creamy ice cream.
Next, introduce airiness. Fold the whipped cream and fluffy egg whites into the eggnog mixture gently. Use a spatula and fold until just combined, keeping as much air as possible. This gives the ice cream its light and fluffy texture. Paying attention to these techniques will shape the quality of your protein ice cream, making it that much more luxurious and enjoyable.
Serving and presentation ideas
Presenting your protein ice cream thoughtfully can make it even more enjoyable. Serve it in pre-chilled bowls to keep its texture, anything from clear glassware such as traditional ice cream glasses or wide, shallow dessert bowls.
For a refreshing and tropical twist, why not serve your snack in halved and hollowed-out fruits like oranges, lemons, or even coconut halves?
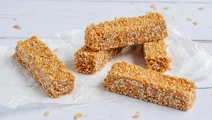
Pair it with other treats like these protein chocolate snacks; the creamy texture and subtle sweetness of the ice cream provide a refreshing contrast to the rich chocolate flavours.
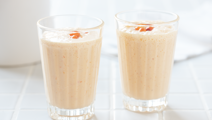
Similarly, when paired with this protein chocolate mousse, the ice cream perfectly complements the chocolatey notes and creamy texture of the mousse, while offering a cool and refreshing counterpart.
Can I make this protein ice cream with an ice cream maker?
An ice cream maker isn’t essential to make this protein ice cream, but it will help you to achieve a thicker texture if so desired.
If you don’t have access to an ice cream maker, a simple no-churn method also works well. Just put the mixture in the freezer and stir every 30 minutes to prevent ice crystals from forming. Keep doing this until the ice cream is as creamy as you like. This method takes a bit more time, but you'll still end up with a tasty treat.
Get the perfect scoop, every time
Scoop like an expert with these key techniques:
- Use the right scoop: a solid metal scoop with a comfortable handle provides the best leverage and control.
- Warm the scoop: before scooping, dip the scoop in warm water for a few seconds and shake off excess water. Keep a bowl of warm water nearby to re-dip between servings.
- Soften the ice cream: allow the ice cream to soften slightly at room temperature for 5-10 minutes before scooping.
Scoop in an “S” motion: instead of digging straight down, use an "S" or zigzag motion to glide the scoop through the ice cream. This technique reduces resistance and helps form rounder, more even scoops.