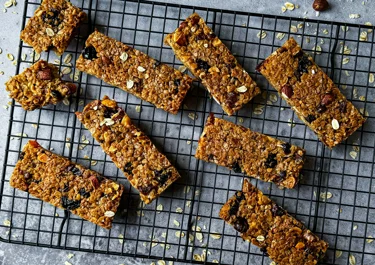
Fruit and nut bar
&format=webp)


Instructions
Questions about fruit and nut bars
Create a batch of our fruit and nut bars and find answers to common questions about this snack. Learn about alternative sweeteners and easy ingredient swops. Keep reading to personalise these treats to your preferences.
Ingredients
Oats | 120 g |
|---|---|
Granulated sugar | 80 g |
Butter | 80 g |
Mixed nuts (e.g. almonds, hazelnuts, and walnuts) | 90 g |
Dried fruits (e.g. apricots, cranberries, and raisins) | 90 g |
Honey | 3 tbsp |
Salt | ¼ tsp |
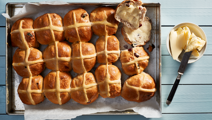
Other recipes
&format=webp)


Master the texture and consistency
Achieving the perfect texture and consistency is crucial for crafting irresistible fruit and nut bars. Start by ensuring your melted butter and honey mixture is thoroughly combined and evenly coats all the dry ingredients. This ensures every bite is perfectly sweet and cohesive.
When incorporating the chopped nuts and dried fruits, distribute them evenly to achieve a balanced blend of flavours and textures throughout the bars. Press the mixture firmly into the baking mould to create bars that hold together well without being too dense.
Bake them just until golden brown to maintain a chewy yet firm texture. Finally, allow the bars to cool completely before cutting to ensure clean, uniform slices. Mastering these steps guarantees that each fruit and nut bar is not only delicious but also a delight to bite into, with a harmonious balance of crunch and chewiness.
Nuanced tips for perfection
Elevate your fruit and nut bars by toasting the nuts. Heat them in a dry skillet or oven until golden and fragrant. This step brings out their flavour and adds depth to your bars. If the nuts are salted, consider cutting back on the recipe's salt to keep the taste balanced.
For bars that are perfectly firm, chill the mixture before baking. This hardens the butter, which helps the bars stay solid during and after baking.
Also think about the sweet and savoury balance in your bars. You might want to reduce the honey or sugar slightly, letting the natural tastes of the nuts and fruits stand out. For a richer texture, substitute some of the oats with finely ground almond or coconut flour.
These nuanced tips will elevate your fruit and nut bars to a level of perfection that delights with every bite.
Best practices for storage and freezing
To keep your snack fresh, store them in a container that seals well. Place parchment paper between each layer to stop the bars from sticking. This approach is perfect for storing at room temperature if you plan to eat them within a week. If not, pop the container in the refrigerator where the bars will stay fresh and decadent for several weeks.
For longer storage, freezing is your best bet. Wrap each bar in cling film to protect it from moisture and freezer burn. Place them in a freezer bag, removing as much air as possible before sealing. This keeps the bars tasting great for up to three months. When you're ready to enjoy them, let them thaw at room temperature for about an hour.
Explore a world of flavours with mix-and-match ingredients
Unlock endless possibilities by experimenting with different combinations of ingredients for your fruit and nut bars. Combine the rich crunch of hazelnuts with the tartness of dried cranberries, or pair the buttery taste of macadamia nuts with the sweetness of golden raisins.
You can also Incorporate spices like cinnamon, nutmeg, or cardamom to add warmth and depth. For an extra textural boost, include seeds such as chia, flax, or sesame seeds. As a final touch, enhance the bars with a drizzle of honey for sweetness, or maple syrup for a richer flavour profile.
Whether you prefer a classic combination or want to explore bold flavours, enjoy the creative process and savour the results of your homemade creations.
Serve them warm for enhanced flavour
For a delightful twist, consider serving them warm. Heating the bars gently enhances the flavours, releasing the natural sweetness of the dried fruits and nuts. The warmth also adds a comforting element, making them a cozy treat.
Simply heat the bars in a microwave for a few seconds or warm them in a toaster oven until just heated through. This simple step elevates the eating experience, allowing you to fully appreciate the blend of textures and flavours with each bite.
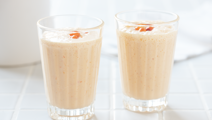
Serve them with a dollop of thick and creamy skyr, a scoop of cool berry nice cream or a warm granola muffin, elevating your snacking experience from great to extraordinary.
Uniform cutting for presentation
Achieving uniform cuts is key to presenting your fruit and nut bars beautifully. Once cooled completely, use a sharp knife and a gentle sawing motion to create clean, even slices. Wiping the knife clean between cuts helps maintain neat edges and prevents sticking.
Aim for consistent sizes to enhance visual appeal and ensure each bar is equally enjoyable. For a professional touch, consider using a ruler or a bench scraper to guide your cuts for precise dimensions. With attention to detail, you can showcase your homemade fruit and nut bars with pride, making them not only delicious but visually appealing as well.
Give your fruit and nut bars a gourmet touch
Transform your homemade snack bars into gourmet delights with these creative tips and additions. After baking and cooling, drizzle a contrasting glaze over the bars – try a lemon or orange glaze for a citrusy twist, or a thin layer of caramel for a rich indulgence. Sprinkle edible flowers or colourful sprinkles on top before the glaze sets to add a whimsical touch.
Another gourmet option is to infuse the melted butter with herbs like rosemary or thyme before mixing it with the other ingredients, imparting a subtle savoury note that complements the sweetness of the fruits and nuts. For an elegant finish, dust the bars lightly with powdered sugar or cocoa powder just before serving. These creative touches will elevate your fruit and nut bars to a gourmet level, perfect for special occasions or impressive homemade gifts.
Ingredient ratios and consistencies
Pay attention to the balance of dry and wet ingredients in this recipe. Too much of either can lead to bars that crumble or don't set. Aim for a mixture that's sticky but firm enough to press into the baking pan. If your mix seems too dry and falls apart, a little more honey can help it stick together. If it's too sticky, add some oatmeal or ground nuts to absorb the extra moisture.